The Latest Project

So, I wasn’t sure what to write about today.  This is probably not technically a gardening or food post, but we’ll see if I can connect it.  My Dear Husband has many talents, one of which is woodworking.  He can make the most beautiful cabinets, furniture, rocking horses, and just about anything else out of wood.  He and I had been talking for a while about putting a wine glass rack over the kitchen sink.  My thought was that it would take the place of a valance over the window and just bring something unique to the space.  The problem was with lighting.  I had a fluorescent light over the kitchen sink (not my favorite kind of light, but it allowed me to see if the dishes are clean).  If we put up the wine rack, we would have to remove the light.  Solution…light the wine rack.  This created a new problem…how to light it.  We went to our local building supply store to look at lighting, and wow, is it expensive.  We just couldn’t put out $60-$100 for a light over the sink right now, so back to square one.  Then I noticed that our craft store already had their Christmas displays out (way too early in my opinion, but who listens to my opinion anyway).  I decided to try Christmas lights on my wine rack.  I was a little leery of regular Christmas lights, as they have been known to cause fires (and sometimes I don’t remember to turn off the light over the sink), so I thought we would try LED Christmas lights.

Well, we have put up the rack (with lights) and I am still uncertain as to how well I like it.  Don’t get me wrong, I still think it is a great idea and really like the way the glasses look over the sink, but I think I would like to change out the lighting eventually.  First, the LED Christmas lights DO NOT give out much light.  The only way I can tell they give out any light is if it is completely dark in the room when I turn them on.  So I really don’t have as much light as I would like when I wash dishes.  Second, I’m not sure how I feel about seeing all the light bulbs.  Please tell me what you think:
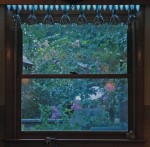
I really like the rack, and my DH did a wonderful job, I just need to figure out if there is a better lighting solution.

By the way, did you notice the view out the window?

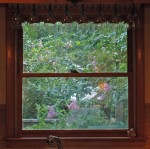
Unlit During the Day

That is one of my many Crepe Myrtles and I just love seeing the beautiful flowers out my window.  See, I was able to make this about gardening 🙂

What is your favorite recent project? 

Home Canning Tomatoes

This week has been quite productive.  On Monday, I sold my first two trays of sweets.  One tray of cookies (lemon cookies and sugar cookies) and one tray of brownie bites (mixed flavors).  It was a last minute order and I delivered it in about 4 hours.  Woo Hoo!

Then on Wednesday I realized I had a few too many fresh tomatoes to eat before they went bad (you never actually have too many tomatoes).  So I canned a few of them.  I did two separate canning processes and thought I would tell you about them here.

First, I canned regular, home grown, garden tomatoes.  These are the big, sweet, juicy, delicious ones that you just can’t get in the store.  They will make the most wonderful soups this winter!  I happen to have my grandmother’s copy of a booklet called “Food Preservation in Alabama” (published in 1950).  The process for canning tomatoes that I found in there makes the best canned tomatoes of all.  Here is what it says:

“A water-bath canner is used for processing fruits, tomatoes, pimientos, rhubarb, jam, preserves and relishes.  The temperature of boiling water (212 degrees F) is the temperature required for destroying bacteria that would be harmful to these products.  A higher temperature will affect flavor and vitamin content.”

I use a large stock pot, because I don’t have an actual canner, and it works quite well.  You will need some kind of a rack in the bottom (the book suggests a wooden rack, but anything that will boil and will raise the jars off the bottom will work).  You will first need to sterilize your jars, canning funnel, lids (always use new lids) and the tongs you use to place and remove the jars from the sterilization process.  To sterilize them, place the jars, funnel and then working end of your tongs (leave the handle where you can get to it) in your canner full of boiling water and boil them for 5 minutes. At the end of 5 minutes, turn off the heat and drop the jar lids in for just a minute.  Remove everything and set aside on a clean towel until ready to fill.  To can my tomatoes, I use the cold pack method given in the book:

“Select firm ripe tomatoes of medium size, free from spots and decay (I used all sizes, as I wanted them chopped anyway).  Wash, place in a wire basket or square cheesecloth, and dip into boiling water for about 1 minutes, according to ripeness.  Then plunge quickly into cold (iced) water, drain, peel and core promptly (and chop if you want).  Pack into containers (sterilized jars) as closely as possible and until enough juice is released to cover the solids (this is why it works best if you chop the tomatoes).  Add 1 teaspoon of salt per quart.  Process in a water-bath canner for 30 minutes (pint or quart jars).”   Make sure you wipe off the top of the jars before placing the lid and hand tightening the band.  The rim of the jar must be clean to get a good seal.  The water in your canner should be hot but not quite boiling when you put the jars in, and don’t start your timing until the water comes to a boil.  Also, make sure the water in your canner covers the jars by a least an inch.

Canned Tomatoes

Aren’t they beautiful?  I also had a big bowl of grape and cherry tomatoes.  I am bad to watch the Cooking Channel and had seen an episode of French Food At Home where host, Laura Calder, canned these tomatoes whole.  The episode was called Well Preserved. I followed her directions and wound up with 3 quarts (half full) of tomatoes.  I didn’t have any fresh thyme, so I used fresh basil (I use it with tomatoes a lot), and it took a lot longer to get them to collapse down than she said, but I think they turned out beautifully:

Canned Grape and Cherry Tomatoes

I wish I had an large open shelf in my kitchen, I would display my canned tomatoes as decoration (until I eat them of course).

Have you every done any home canning?  What is your favorite fruit or vegetable to can?

Happy Canning!

My Favorite Healthy Snacks and Sweets

Last week I put a not-so-healthy recipe out here that was my Grandmother’s.  So I thought I would counter that with what I make when I want something sweet.

My favorite place to get healthy dessert and snack recipes is a blog called Chocolate Covered Katie.  I have mentioned her blog here before and highlighted a recipe.  I have since tried several more and here are my favorites.

Dark Chocolate Almond Candy Bars

This is made from CCK’s recipe for Hot Chocolate Butter.  I make up the chocolate butter (I usually double the recipe), add a good handful of roughly chopped, toasted almonds, spread it in a small pan and place it in the freezer.  When it has gotten solid, I cut it in pieces and then store it in a plastic bag in the freezer.  It is really delicious, and helps satisfy my chocolate cravings, without blowing my diet.

Quaker-Style Chewy Granola Bars
Photo by Chocolate Covered Katie

I also love CCK’s Quaker-Style Chewy Granola Bars.  I like to add mini-chocolate chips and fresh grated coconut.  Sometimes when I am really snack-hungry, I will take two of the granola bars and put a chocolate almond bar between them.  That way I have splurged without breaking the bank diet.

Chocolate Covered Katie’s blog also has many cookie recipes.  Two of my favorites are Chocolate Lace Cookies and Flourless Oatmeal-Raisin Cookies.

Another snack that I like to make is Peanut Butter & Dark Chocolate Shortbread Protein Bars.  These are found on a website that features coconut recipes because they are made with coconut oil.  This is a great snack for when it is going to be a while before the next meal.  With the protein powder in them, they will satisfy my hunger for several hours.

So these are a few of my favorites.  What are your favorite healthy desserts?

I hope you will try one or more of these recipes and let me know what you think.  When you do, you will realize you can have your cookies and eat them too.  Wishing you happy and healthy snacking!

Mamaw’s Coffee Cake

Hello everyone.  First, let me apologize for not posting for such a long time.  I have been rather lazy uninspired.  When I started this blog, I didn’t realize just how hard it is to come up with a topic three times a week.  Soooooo, I am going to shoot for once a week for a while, to see if I can get better about being consistent.  Then I will increase the postings as I improve.  Thank you to everyone for your patience.

That said, I also want to explain why this posting is not about healthy eating, as I am sure you realized by the title.  I have decided to start a little business making cakes, cookies and party trays for special occasions.  So, if you know anyone in the Atlanta area that needs that service, send me an email and I will be happy to contact you or them.

To get started, I pulled out several old family recipes and broke them down by cost.  Most of these are recipes I have not made in years, so I figured I might need to try them out again to make sure they still taste as good as I remember.  It is rather strange to be baking things I no longer eat, but I am sure I can find people that will be willing to help me in that area.

This recipe, for example, had to be adjusted.  The original recipe calls for two 4.5 ounce jars of baby food plums, apricots or dates.  Well, they don’t make those fruits as baby food any longer.  I found apricots mixed with other fruits like apples and pears, but not on their own, and I found no plums (or dates).  This makes me rather sad, as I can remember as a child loving it when my Mamaw made this cake and let me lick the plum jars.  Those were really delicious!  I have come up with a substitution that works, though, so I can use this recipe.  I rehydrated dried apricots, and ran them through the food processor.  I used a 6 oz. package of dried apricots and it made more than I needed.  After I made the cake, my mom said, “why don’t you blog about your cake?”  So, here it it.  My Mamaw’s Coffee Cake recipe:

Mamaw’s Coffee Cake

Cake:

  • 2 cups self-rising flour
  • 2 cups sugar
  • 1 cup vegetable oil
  • 4 eggs, slightly beaten
  • 1 cup plus 1 tbsp. (9 oz.) dried apricots, rehydrated
  • 1 tsp. vanilla extract
  • 1 tsp. rum flavoring

Streusel Topping:

  • ¼ cup brown sugar
  • 2 tsp. cinnamon
  • ½ cup chopped pecans
  • Scant 2 Tbsp. flour

Glaze:

  • 1 cup powdered sugar
  • 2 tbsp. milk
  • 1 tsp. vanilla

To rehydrate the apricots:  Cut apricots in quarters and place in a bowl.  Pour very hot water over the apricots to cover, plus about an inch of water.  Let stand for 1 hour.  Put apricots and soak water in a food processor and process until smooth.  Measure out 1 cup plus 2 tablespoons (9 oz.) for the recipe.

Preheat oven to 350º.  In large mixing bowl at low speed, beat the eggs and sugar until blended.  Add oil alternately with flour, mixing well after each addition.  Add apricots, vanilla and rum flavoring; beat at medium speed for 2 minutes.  In separate bowl, stir together topping ingredients.  Pour ½ batter into greased and floured 10-inch tube pan.  Sprinkle with ½ topping mix.  Repeat with remaining batter and topping.  Bake at 350º for 1 hour 10 minutes.  Cool in pan for about 5-10 minutes.

While cake is cooling in pan, heat glaze ingredients in a small saucepan on medium heat.  Turn cake onto plate, with streusel topping facing up.  Pour glaze over hot cake.

Mamaw’s Coffee Cake

I hope you will let me know if you try this recipe and how you like it.  It is really delicious with a fresh cup of coffee.  I will be trying another version with fresh plums.  The plums on our tree are getting ripe, so I am going to make a plum sauce by cooking the plums and then running them through the food processor.  Later, I’ll try this cake with the plums.  I’ll let you know how it turns out.

What is your favorite old family recipe?

“Ranch” Turkey Burgers

I got to thinking about the ranch burgers I am always hearing about.  You know, mixing ranch salad dressing mix with your ground beef before making your burgers.  Since we eat a lot of turkey burgers, I decided the seasonings that go into my Homemade Ranch Dressing would be delicious in a turkey burger, and I was absolutely right!

“Ranch” Turkey Burgers


  • 1 1/4 lbs. Ground Turkey
  • 1 tsp. Onion Powder
  • 1 tsp. Garlic Powder
  • 1 1/2 tsp. Dried Parsley
  • 1 1/2 tsp. Dried Chives
  • 1 Tbsp. Worcestershire Sauce
  • 1 1/2 tsp. Olive Oil
  • Salt and Pepper

Mix all ingredients and form into 5 patties.  Grill or pan fry in a little more olive oil until patties reach an internal temperature of 180 degrees.

This recipe calls for 1 1/4 lbs. ground turkey, because that is size package I had.  You could adjust the seasonings just slightly if you only have a 1 lb. package.

These were moist and delicious with a great ‘burger’ flavor.  I hope you enjoy them!

What is your favorite way to cook burgers?.

Hydrangeas – Part 2

As promised, here are some pictures of my hydrangeas that are now in full bloom.

My largest Hydrangea bush

Close up of large Hydrangea

This bush had one pink bloom on it…

Single pink bloom

…weird, huh?

Formerly pink Hydrangea

This one was a pink Hydrangea when it was planted 2 years ago, and bloomed pink last year too.  Here is a close up:

Close up of formerly pink Hydrangea

Oak Leaf Hydrangea

It is funny how the Oak Leaf Hydrangea blooms white but changes to a pink tinge as it ages.

Lady In Red Hydrangea

And, finally, my Lady in Red lacecap Hydrangea.  This on will continue to bloom most of the summer.

I hope you have enjoyed my Hydrangeas as much as I have.  Soon, I will be showing my Crepe Myrtles, which have started blooming surprisingly early this year.

Have any of your Hydrangeas changed color since you planted them?

Crock Pot Pork Stew

I usually would be doing a gardening post today, but I made the a really delicious stew on Sunday and wanted to share it with you.  It was a perfect Mother’s Day meal because I could just fix it and forget it.  Then when it was time to eat, it was ready to serve.

Crock Pot Pork Stew

Crock Pot Pork Stew

  • 1 1/2 – 2 lb. boneless Pork Tenderloin, cut into 1-inch cubes
  • 5-6 medium Red Potatoes
  • 3 medium Carrots
  • 2 medium onions
  • 1 lb. Mushrooms
  • 1 stalk Celery
  • 2 tsp. dried Thyme
  • 3 tbsp. Olive Oil
  • 1 tbsp. Butter
  • 2 tbsp. all purpose Flour (I used Brown Rice Flour to make it gluten free)
  • Salt and Pepper
  • 1 cup Chicken or Turkey Stock
  • 2 cups Water, approximately

Cut all vegetables except celery into large chunks, all approximately the same size.  Chop celery.  Layer potatoes, carrots, mushrooms, celery and onion in crock pot in that order. Sprinkle with the Thyme and some salt and pepper.

In a large skillet, brown pork in olive oil.  When brown, remove from pan and place on top of vegetables in crock pot, leaving oil in pan.  Add butter to pan and melt.  Whisk in flour, salt and pepper.  Continue to whisk and cook on medium heat until flour begins to brown. Slowly add stock and then water, continuing to whisk while adding.  Once your gravy is smooth (you want it to be rather thin), pour it over your meat and vegetables in the crock pot.  Cover and cook on low for 8 hours.  In the last hour you may need to stir the stew, especially if you notice that some of your flour is sitting on top of the meat.  I noticed this, but it may be because I used the brown rice flour.

This was such a delicious dish that my mom said she is going to make it for the next covered dish meal at her church.  For me, that is quite a compliment!

What is your favorite dish to cook in the crock pot?

Ground Turkey Jamboree

This is my adaptation of my mom’s recipe for Meat Jamboree.  This one has less fat, no additives and no gluten.  I hope you enjoy it.

Ground Turkey Jamboree

Ground Turkey Jamboree

  • 1 1/2 lbs. ground Turkey
  • 1 medium Onion, chopped
  • 1 tbsp. Olive Oil
  • Salt and Pepper to taste
  • 1 1/4 cups Homemade Tomato Soup
  • 2 cups cooked Brown Rice
  • 3/4 cups shredded Cheddar Cheese
  • 1 cup cooked Green Beans

Preheat oven to 350 degrees.  Brown chopped onion in olive oil.  Add ground turkey and season with salt and pepper, cooking until turkey is no longer pink.  Stir in tomato soup.  In 2 qt. greased casserole, layer 1 cup of cooked rice, half of ground turkey mixture and 1/4 cup cheese.  Repeat with remaining rice, turkey mixture and another 1/4 cup cheese.  Arrange green beans on top and sprinkle with remaining cheese.  Cover and bake at 350 degrees for 25 minutes.  Remove cover and continue baking for 10 minutes.

Note:  For additional flavor, cook rice in chicken or turkey stock, which makes a delicious side dish on its on.

I hope you enjoy this delicious casserole, the DH loved it!

What is your favorite casserole that your mom used to make?

Homemade Tomato Soup

My mother used to make a recipe for a ground beef casserole that she called Meat Jamboree.  I was a delicious combination of ground beef, canned tomato soup, egg noodles, green beans and cheese.  When I decided I wanted to work on it and make it healthier, I knew I did not want to use canned soup, so decided to make my own.  Here is my Tomato Soup recipe, and next week I’ll share my Ground Turkey Jamboree recipe.

Homemade Tomato Soup with Basil

Homemade Tomato Soup

  • 1 qt. Tomatoes
  • 1 tbsp. Olive Oil
  • 1/2 med. Onion, chopped
  • 1 stalk Celery, chopped
  • 1 med. Carrot, chpped
  • 1/4 lb. Mushrooms, chopped
  • 1 clove Garlic, minced
  • Salt and Pepper to taste

In medium saucepan, saute onion, celery, carrot and mushrooms in olive oil, with salt and pepper, until soft.  Add garlic and saute for just a few minutes, being careful not to burn the garlic.  Add tomatoes and simmer covered for about 15 minutes then remove the lid and simmer uncovered 15-20 minutes.  I then used an immersion blender to blend the soup until it was smooth.  If you don’t have an immersion blender, you could (very carefully) pour the soup into your food processor of VitaMix and blend until smooth.  If the soup is too thin, you can continue to cook uncovered for a short while to thicken it.  I used my home canned tomatoes, but this would also be delicious with fresh tomatoes from your garden (I would peel them and it might take a little longer to cook to the right thickness) or you could use store bought canned tomatoes (probably about 3 regular sized cans would work just fine).

About the time I finished making the soup, a friend of mine came over with some fresh basil from her garden.  I removed the amount of soup I needed for my Jamboree and then chopped the basil (about 2 tbsp.) and added it to my soup, cooking it about another ten minutes to incorporate the basil.  I just thought it was delicious before the basil!

This recipe made about enough soup for 2 people, but it could easily be doubled or tripled to serve more.

What is your favorite homemade soup?

Hydrangeas – Part 1

First off, let me apologize for it being so long since my last posting.  I have been trying to post three times a week, but last week got rather hectic.

I have been thinking very hard about what I wanted to post.  I was walking around my yard yesterday and realized most of my Hydrangeas are about to bloom.  So, out came the camera (of course).  None of my Hydrangeas have opened up completely, so that is why this is part 1.  When they get fully opened, I’ll post part 2, that will be full of pictures of their beauty.

Bigleaf Hydrangea - Lavendar

Bigleaf Hydrangea – Lavendar

Pink Bigleaf Hydrangea – New Blooms

I actually have several different Hydrangeas in my yard, as they are one of my favorite flowers.  I have two of the regular bigleaf varieties with the mophead flowers.  One blooms lavendar and the other was still pink last year.  We shall see if it stays that way or not. I have not added any lime to the soil to raise the ph, so it may not stay pink.  These bloom once a year, in the spring.

Lacecap Hydrangea – ‘Lady In Red’

I also have a bigleaf variety with lacecap flowers.  This one is called ‘Lady in Red’.  It has beautiful blue flowers, but the name comes from the red stems on the new growth.  This one will bloom just about all summer.

Oakleaf Hydrangea

I have several oakleaf Hydrangeas too.  Their flowers grow in a cone shape and are white. They also only bloom once a year in the spring, but can really brighten up a shady area.

I have several panicle Hydrangeas that I have rooted from a very large bush I had.  Last year I had to move the large bush, as the trees around it had grown so large, it was not getting any sun and would not bloom.  While oakleaf Hydrangeas and most bigleaf Hydrangeas will grow in shady areas, panicle Hydrangeas must have a good bit of sun to bloom.  The pancles I have are still too young to bloom, and the large one I moved did not survive.  Hopefully, in a few years, I will begin to see blooms on the young ones.

I think most of my Hydrangeas should be fully opened by next week, so look for some updated pictures then.

What is your favorite color of Hydrangea?

Related articles: